Old British Seagull outboards had a lot of brass on them: the gas tank was brass; almost all the nuts were brass. There were some chrome pieces, including the drive shaft, throttle, and sometimes the exhaust manifold but this varied depending on the model. Overall a brand new British Seagull would have looked very shiny in the showroom. My Seagull had done a lot of sitting around getting rusty: the brass was rusted and the chrome was quite pitted. Some of the bolts were still in good repair so I started by buffing them, then moved on to polishing the chrome.
Above: Using a Dremel to ‘buff’ a bolt. The vice holds the bolt while the operator can use both hands with the Dremel. Don’t forget eye protection!
Above: You can easily see the difference between a newly buffed bolt and the old one.
Where most outboards have one lower ‘leg,’ British Seagulls had two: a drive shaft and a exhaust manifold (on other outboards these are amalgamated). The drive shaft was chrome while the manifold was only chrome on certain Seagull models. Otherwise it would be made of cast aluminum, as on my Seagull. Re-chroming is always an option, but also would be rather pricy.
Above: British Seagulls had two lower legs. The upper arrow indicates the exhaust manifold, while the lower arrow indicates the drive shaft. The chrome drive shaft has been restored on this one.
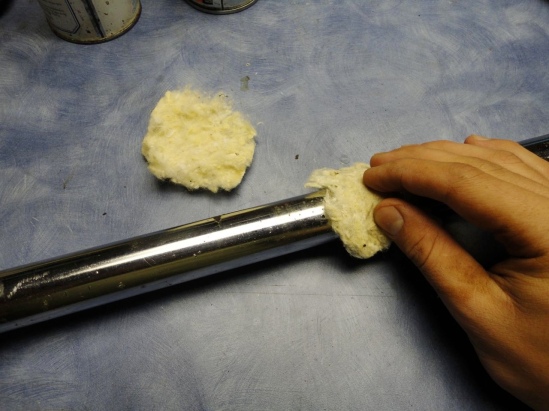
Above: Cleaning the chrome drive shaft. I used ‘Silvo’ chrome polish compound on it.
Above: The shaft after cleaning and polishing. It looks like it’s been re-chromed, doesn’t it?
Next I started cleaning the throttle…
Above: The throttle before.
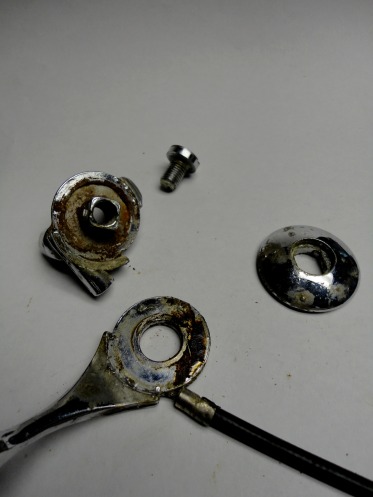
Above: The throttle, in pieces. The white stuff on it is the Silvo chrome polish.
Salt water will corrode an outboard’s bolts if the motor is not flushed with fresh water after being used. Most corrosion occurs on the lower unit because this part is always in the water. Sometimes bolts are beyond restoring when they have become overly corroded and rusted through the years, in this case it is better to buy replacements. I encountered this problem on the Seagull when I discovered that all the bolts on the lower unit were rusted and I couldn’t get them out! I had to use a torch and heat them up before I could attempt to remove them. Once the bolts were out I could get a closer look, but I didn’t think it was worth cleaning them because they were chipped and dented. Plus, two were screws and only one was a bolt. Screws can strip easily so it would be better to replace them with bolts. I found some replacements at Fastener Force One Resources, a local place in town where one can find all sorts of machine parts.
Above: The original screws on the lower unit.
Above: New bolts from Fastener Force. The two center ones are the replacements for the old screws.
That’s how I cleaned up the bolts on the Seagull. Bolts are small pieces and it’s easy to dismiss them, but an engine looks much more complete when the bolts have been restored.


